

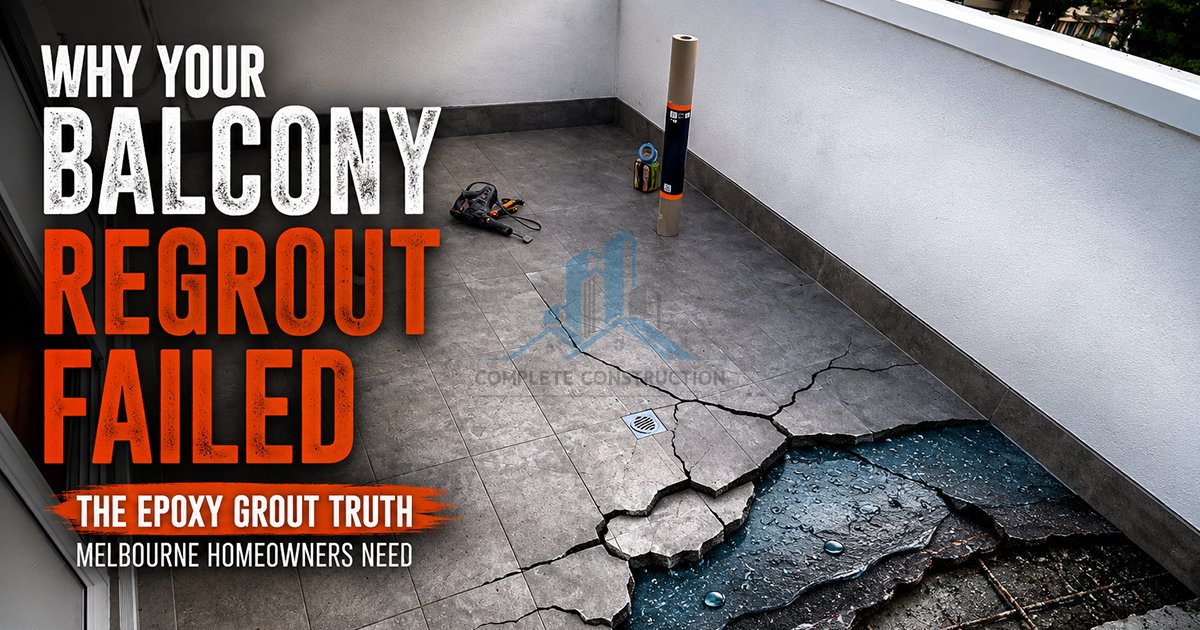
Why Your Balcony Regrout Failed: The Epoxy Grout Truth Melbourne Homeowners Need
Many homeowners across Melbourne’s suburbs encounter a recurring, frustrating structural cycle. A balcony exhibits signs of moisture ingress, an initial contractor recommends a cosmetic facelift, and the tiles are scraped out and filled with a premium topical compound. Yet, within months, the balcony grout cracking after repair Melbourne cycle repeats itself.
This comprehensive technical guide unpacks the physical and structural engineering realities behind why a failed balcony regrout solution requires looking far beneath the tiled surface. We will analyze the limitations of topical rigid barriers, the chemical characteristics of modern grouting compounds when subjected to structural movement, and how to differentiate between basic superficial erosion and deep-seated structural waterproofing failure.
Can Regrouting Alone Fix a Leaking Balcony?
Can regrouting alone fix a leaking balcony?
No, regrouting alone cannot fix a structurally leaking balcony. Grout is designed exclusively as a cosmetic filler and a sacrificial wear layer between tiles; it is inherently rigid and porous. While a fresh layer or an epoxy compound may briefly slow down surface water ingress, a regrout doesn’t stop balcony leak issues if the underlying primary waterproofing membrane system is fractured, degraded, or non-existent. Water will quickly find alternative transit paths through hairline tile junctions, perimeter expansion lines, or micro-cracks caused by building movement, continuing to cause silent structural decay beneath the tiled field.
People Also Ask:
Why does my balcony keep leaking after being regrouted?
Repeated grout failures occur because external balconies undergo significant thermal expansion and structural contraction. If the underlying waterproofing membrane has failed, water accumulates in the bedding screed. This trapped moisture puts hydrostatic pressure on the tiles from below, breaking the bond lines and causing premature grout degradation or fracturing.
Is epoxy grout completely waterproof for external balconies?
While epoxy grout material is non-porous and water-resistant in a controlled laboratory setting, it is completely rigid once cured. Because external building structures shift naturally, this structural stiffness causes epoxy grout to delaminate from tile edges or crack under tension when the building undergoes natural seasonal movement.
What are the signs of a failed waterproofing membrane under a balcony?
The primary warning indicators include water stains or damp patches appearing on the ceilings or plasterboard below, tiles that sound hollow or “drummy” when tapped with a hard object, white chalky efflorescence building up along grout lines or balcony edges, and persistent musty odours near external door tracks.
The High Stakes of Melbourne’s “Four Seasons in One Day” Climate
Properties across Melbourne are subjected to some of the most punishing and volatile weather conditions in Australia. The localized phenomenon of “four seasons in one day” is not merely an inconvenience for residents; it places extraordinary mechanical stress on external building envelopes.
- Extreme Morning: Intense UV Index 11+ leads to surface thermal heat upwards of 50°C.
- Rapid Structural Expansion: Materials shift continuously under direct solar radiation.
- Sudden Southern Ocean Cold Snap: Sweeping rainstorms cause temperatures to plunge abruptly by 20 degrees within hours.
- Abrupt Contraction: Thermal shock forces dynamic movement, creating micro-fracturing along rigid grout lines.
Unless every component of the balcony build is engineered to absorb these dynamic changes, structural failure is inevitable. The outermost finish, the grout line, is the first element to bear the brunt of this mechanical force.
The Core Dilemma: Regrout vs Waterproofing Balcony Failure
To fully understand why topical repairs break down, property owners must understand the distinct engineering boundary between a regrout vs waterproofing balcony failure.
The Cosmetic Grout Barrier
Tile grout, whether cementitious or polymer-modified, serves to fill the spaces between tiles, accommodate nominal manufacturing variances in tile sizes, and prevent lateral tile shifting. It is a surface element. It is not, and has never been defined by Australian Standards (such as AS 3740 or AS 4654.2) as a standalone waterproofing system.
The Sub-Surface Waterproofing Membrane
True architectural waterproofing consists of a continuous, elastomeric, internal chemical barrier—typically a liquid-applied or torch-on sheet membrane system—installed directly onto the structural floor substrate beneath the bedding screed and tile assembly. This hidden membrane is the true line of defense that stops water from penetrating the structural bones of the building.
When a balcony leaks, it is almost never because the grout is missing; it is because the internal waterproofing membrane beneath the tiles has ruptured, worn out, or was poorly detailed during original construction. Simply scraping out surface grout lines and swapping them for fresh material does nothing to address the failed sub-surface barrier.
Anatomy of a Breakdown: Why Did My Balcony Regrout Fail Melbourne?
When an owner asks, “Why did my balcony regrout fail Melbourne?”, the answer lies in a combination of structural mechanics, installation errors, and physical science. The core reasons behind premature surface repair breakdown include:
- Substrate Moisture Entrapment: If a balcony has been leaking, the porous sand-and-cement mortar bed (the bedding screed) trapped under the tiles is already completely saturated with water. When a contractor installs new grout over the top, that bulk water remains trapped. As the Melbourne sun beats down, this moisture vaporizes and expands exponentially, generating upward pressure that detaches the grout from the tile flanks.
- Grout Adhesion Failure Balcony Dynamics: Grout requires clean, dry, structural tile edges to achieve mechanical and chemical adhesion. In a remedial repair scenario, old tile joints are often contaminated with accumulated body oils, dirt, atmospheric grime, soap residues, or old efflorescence salts. If these flanks are not meticulously cleaned down to raw tile clay or porcelain, a total grout adhesion failure balcony event occurs, with the new grout peeling away in long strips.
- Insufficient Joint Depth: For a remedial grout application to achieve structural integrity, the old joint must be raked out cleanly to a depth of at least 3mm to 5mm. Many rushed technicians perform a superficial scratch, applying a wafer-thin veneer of grout over the old bed. This shallow application lacks the mechanical mass to withstand basic foot traffic or thermal stresses, leading to rapid flaking.
- Structural Deflection and Building Movement: Balconies are cantilevers or suspended structures vulnerable to structural deflection. They sag slightly under heavy live loads, flex with wind pressures, and shift as timber frames dry out or concrete foundations settle. Because grout lacks elastomeric properties, it cannot flex with this movement, causing immediate balcony grout cracking after repair Melbourne.
The Epoxy Grout Myth: Why Epoxy Grout Cracks After Repair
To combat recurring leaks, many turn to epoxy compounds as the ultimate remedy, marketing an epoxy grout balcony repair lasting results promise. However, this often results in a misunderstanding of chemical properties versus real-world structural performance.
The Chemical Reality of Epoxy
Epoxy grout is a multi-part resin system mixed with filler silica sands. Once cured, it creates an exceptionally dense, completely non-porous, highly chemical-resistant, and completely rigid solid block. It is highly effective for commercial kitchens, hospital floors, and internal shower bases where chemical resistance and low porosity are required.
The Failure Mechanism on Balconies
While epoxy is impervious to water transmission across its face, its structural rigidity becomes its downfall when applied externally:
- The Stress Concentration Point: When an external balcony floor expands due to solar heating, the individual tiles press against each other. A traditional cementitious grout can slightly compress or erode to relieve this stress. Epoxy grout, being harder than many tiles, refuses to compress.
- Shear Stress at the Bond Line: The mechanical stress is transferred directly to the interface where the epoxy meets the tile flank. As the building continues its natural movement cycle, this intense shear stress forces the epoxy to snap away from the tile edge.
- Micro-Fissuring: Once a single micro-fissure opens along the edge of an epoxy joint, water enters via capillary action. Because the rest of the epoxy field is completely non-porous, any water that enters through these perimeter cracks becomes permanently trapped underneath, speeding up the destruction of the underlying waterproofing system.
The Underlying Culprits: What is Really Happening Beneath Your Tiles?
When property owners encounter a persistent, failed balcony regrout solution, the visible surface cracks are merely structural symptoms. The real problems are almost always hidden from plain sight within the deep floor assembly:
Failed Waterproofing Membranes
Waterproofing membranes can fail for many reasons: continuous UV degradation, old age, chemical degradation from pooling water, or puncture damage during original tile placement. Once a membrane is compromised, water travels freely through the structural concrete slab or timber sub-floor.
Non-Compliant Substrate Falls (Incorrect Gradients)
Australian Standards mandate that external balconies must feature a minimum drainage slope of 1:100 (a 10mm drop for every 1 meter of length) directed towards active floor wastes or drainage scuppers. Many older or poorly built Melbourne balconies are constructed completely flat, or worse, with back-falls that direct water back toward the internal building doors. When water pools continuously on top of tiles or within the internal bedding screed, it creates permanent hydrostatic pressure that gradually softens and destroys any surface grouting material.
Missing or Faulty Perimeter Flashings
Balcony perimeters must feature vertical waterproof terminations (upstands) extending at least 150mm up adjoining walls to prevent wind-driven rain from bypassing the deck assembly. If these perimeter flashings or bond breakers are omitted, water will penetrate behind the skirting lines, rotting the internal structural timber walls and sub-flooring long before showing up on the tile surface.
Product Spotlight in Educational Context: Evaluation of Repair Compounds
In the Australian construction and tiling supply sector, manufacturers have engineered various high-specification grout lines to handle severe environmental exposure. Understanding these product families in an educational context helps clarify what materials can and cannot achieve on an exposed external deck.
Cementitious and Polymer-Modified Repair Compounds (e.g., Ardex Grout Systems)
Standard external cementitious grouts, such as various high-performance Ardex grout replacement balcony compounds, are widely specified across the construction industry. Modern formulations include dry polymer resins blended into the powder mix. When mixed with water or specialized liquid additives, these polymers create a cured matrix with improved density, reduced water absorption, and slightly better flexural strength than raw sand-and-cement mixes.
- Educational Limitations: While these polymer modifications are excellent for standard residential traffic and minimize everyday weathering, they remain classified as rigid cementitious matrix systems. They cannot substitute for structural expansion joints and will fracture if subjected to localized substrate cracking or severe shifting across structural joints.
Structural Epoxy Resin Compounds (e.g., Mapei Kerapoxy Systems)
True resin-based grouts, such as Mapei Kerapoxy grout balcony systems, represent the heavy-duty tier of joints. These are composed of an epoxy resin, a hardener, and treated quartz sands. The resulting cured joint is completely waterproof across its field, offers compressive strengths exceeding standard concrete, and exhibits immense resistance to stain penetration and chemical weathering.
- Educational Limitations: Because these epoxy formulas cure into an unyielding, rock-hard plastic profile, they have an elongation capacity close to 0%. Consequently, they possess no capacity to accommodate multi-directional thermal expansion or structural movement. If specified on an external balcony without a comprehensive grid of elastomeric polyurethane expansion joints, the epoxy will predictably delaminate from the tile flanks or crack along stress lines.
Lifespan Realities: How Long Does Grout Repair Last on Balcony Surfaces?
Property owners evaluating remediation options must ask a key financial question: how long does grout repair last on balcony surfaces under real-world conditions? The answer depends entirely on the condition of the hidden waterproofing membrane.
Scenario A: The Under-Slab Membrane is Uncompromised (Surface Wear Only)
If the internal waterproofing membrane is fully functional and the leak symptoms are purely caused by minor superficial surface erosion, a professional regrout using high-quality materials can realistically last 3 to 5 years. In this case, the repair serves its intended purpose as regular cosmetic maintenance.
Scenario B: The Under-Slab Membrane has Failed (Structural Leakage)
If the sub-surface waterproofing membrane is torn, degraded, or non-existent, a fresh application of surface grout—even premium epoxy resin—will rarely last 3 to 12 months. The trapped moisture under the tiles will build hydrostatic pressure during hot days, creating localized vapor pressure that quickly breaks the grout bonds, leading to a recurring failed balcony regrout solution.
Diagnostic Diagnostics: How Specialists Identify the Root Cause
Because guessing at structural water pathways is costly and ineffective, modern waterproofing diagnostics rely on advanced non-destructive technology to accurately assess what is happening deep within a balcony floor assembly.
- Phase 1: Thermal Imaging – Detects hidden thermal anomalies and subsurface moisture plumes.
- Phase 2: Moisture Mapping – Quantifies the exact saturation footprint within the screed bed.
- Phase 3: Hydrostatic Dye Testing – Confirms active entry pathways using UV-fluorescent dye simulations.
- Phase 4: Digital Diagnostics – Delivers a clear, data-backed roadmap for targeted structural reconstruction.
High-Resolution Thermal Imaging
Using infrared thermography, certified leak technicians scan the tiled balcony surface and the ceilings below without removing a single tile. Because wet materials retain thermal energy differently than dry materials, thermal cameras clearly reveal hidden moisture plumes and water tracking routes hidden beneath the tile surface.
Electronic Moisture Mapping
Specialists utilize electronic moisture meters to read the electrical impedance or capacitance through the tile layers. This provides a clear, quantitative map of the dampness levels across the balcony deck, identifying exactly where water is pooling within the screed layer.
Hydrostatic & UV Fluorescent Dye Testing
For complex or multi-level leak paths, diagnostic technicians perform controlled pressure testing across individual sections of the deck using water mixed with eco-friendly UV-fluorescent dyes. By illuminating the structure later with specialized ultraviolet lights, inspectors can trace the precise path the water takes from the upper balcony deck down into the building’s internal framework.
The Permanent Architectural Cure: Fixing Balcony After Failed Regrout
When a balcony has suffered from repeated cosmetic repair attempts, the only long-term, structurally compliant solution is a methodical rebuild from the structural foundation up. A proper remediation process follows a clear sequence of professional trades:
Step 1: Strip Back and Substrate Cleanup
The remediation process begins by removing the existing tiles, bedding screed, and contaminated adhesive layers down to the raw structural foundation, whether it is a solid concrete slab or compressed fiber-cement sheeting. This structural stripping is essential to inspect the timber joists for structural rot or assess the concrete for signs of reinforcing steel corrosion.
Step 2: Drainage Corrections and Flashings
The raw structural floor substrate is ground smooth to remove any old contaminants. Technicians install new heavy-duty metal flashings along all vertical wall upstands, door sill regions, and perimeter edges. Floor drainage wastes are repositioned or replaced to ensure they sit completely flush with the lowest level of the structural floor plan.
Step 3: Application of the Multi-Coat Membrane System
A certified, multi-coat elastomeric waterproofing membrane is applied across the entire floor field, including all perimeter wall upstands, corner junctions, and drainage interfaces. This membrane must be allowed to cure completely to create a seamless, flexible, rubber-like skin that can safely bridge future building movement.
Step 4: Installation of the Engineered Mortar Screed
A high-performance sand-and-cement mortar bed, enhanced with polymer additives, is laid over the cured waterproofing membrane. This screed is meticulously shaped to ensure a consistent, non-compliant fall of at least 1:100 toward the drainage grates, eliminating any future risk of pooling water.
Step 5: External-Grade Tiling and Flexible Joints
External-grade vitrified or porcelain tiles are installed using highly flexible, polymer-modified tile adhesives. Rather than filling every joint with rigid grout, compliant elastomeric polyurethane expansion joints are integrated at regular intervals and along the full perimeter of the balcony. This ensures the finished surface can flex naturally during Melbourne’s temperature swings without cracking or delaminating.
Structural Symptoms vs. Deep Root Causes: Data Matrix
To help property owners make informed maintenance decisions, the following data tables detail the differences between cosmetic issues and deeper structural failures.
Symptoms vs. Underlying Structural Causes
| Observed Surface Symptom | Immediate Cosmetic Threat | Deep-Seated Root Cause |
| Hairline cracking in grout lines | Minor water absorption during rain. | Structural deflection of sub-floor or significant thermal stress. |
| Grout peeling away from tile flanks | Accumulation of surface dirt in joints. | Contaminated tile edges during installation or total grout adhesion failure. |
| Hollow, drum-like sounds when tapped | Individual tile may become loose. | Moisture has saturated the bedding bed, destroying the adhesive bond. |
| White crusty powder along grout joints | Discoloration of the floor finish. | Efflorescence: Free lime dissolving from screed due to chronic water ponding. |
| Water droplets on downstairs plaster | Internal ceiling paint bubbling. | Complete structural failure or absence of the primary waterproofing membrane. |
Technical Comparison: Cosmetic Regrouting vs. Comprehensive Waterproofing
| Engineering Metric | Topical Balcony Regrouting | Deep Structural Waterproofing |
| Primary Project Intent | Restoring surface appearance and refreshing tile joints. | Creating an impervious barrier to protect the building asset. |
| Elongation / Flex Capacity | Close to 0% (Extremely rigid, prone to cracking). | High elasticity (Often >300%, easily absorbs structural movement). |
| Resistance to Thermal Shock | Low (Quickly cracks under rapid temperature swings). | High (Maintains structural integrity across extreme seasons). |
| Handling of Trapped Water | Seals moisture inside, leading to pressure blisters. | Eliminates moisture by correcting floor gradients and drainage. |
| Average Operational Lifespan | 3 to 12 months if membrane has failed. | Long-term permanent protection when professionally detailed. |
Frequently Asked Questions (FAQs)
Can I apply a clear sealer over my cracked grout to stop a balcony leak?
Applying clear silane or siloxane sealers over cracked grout lines is a temporary, short-term measure that rarely provides lasting results. These topical sealers are thin coatings that degrade quickly under direct UV radiation and foot traffic. More importantly, they do not bridge moving cracks or repair a ruptured waterproofing membrane hidden beneath the tile bed.
Why did my newly installed epoxy grout crack within months of application?
Epoxy grout cures into an extremely hard, rigid plastic matrix. External balconies expand and contract continuously due to daily temperature fluctuations. Because cured epoxy lacks elastomeric flexibility, it cannot absorb this thermal movement, causing it to detach from tile edges or crack along lines of structural stress.
How does a failed balcony membrane cause “concrete cancer”?
When an internal waterproofing membrane fails, rainwater seeps deep into the structural concrete slab. This moisture triggers corrosion in the internal steel reinforcing bars. As the steel rusts, it expands up to eight times its original volume, generating immense internal pressure that cracks and breaks away the surrounding concrete. This serious structural degradation is known as concrete cancer or spalling.
Is a building permit or certified practitioner required for balcony waterproofing in Victoria?
Yes, under Victorian building regulations, external waterproofing is classified as specialized structural building work. Remedial waterproofing installations must be executed by licensed professionals to ensure compliance with Australian Design Standards (AS 4654.2) and to safeguard property insurance policies.
Conclusion: Protecting Your Melbourne Property Asset
Repeatedly patching a leaking balcony with cosmetic grout modifications is an expensive, ineffective cycle that leaves your property’s underlying structure vulnerable to silent water damage. When a balcony shows signs of failure, the smart path forward is to accurately identify the root cause of the issue rather than simply masking the visible surface symptoms.
If your home’s external balcony is showing signs of grout failure, efflorescence, loose tiles, or moisture stains, avoid the risks of short-term guesswork. Contact a qualified structural specialist today to arrange a comprehensive leak inspection. Utilizing advanced non-destructive thermal imaging and electronic moisture mapping will reveal exactly what is happening beneath your tiles, providing a clear roadmap to protect your property investment for the long term.